
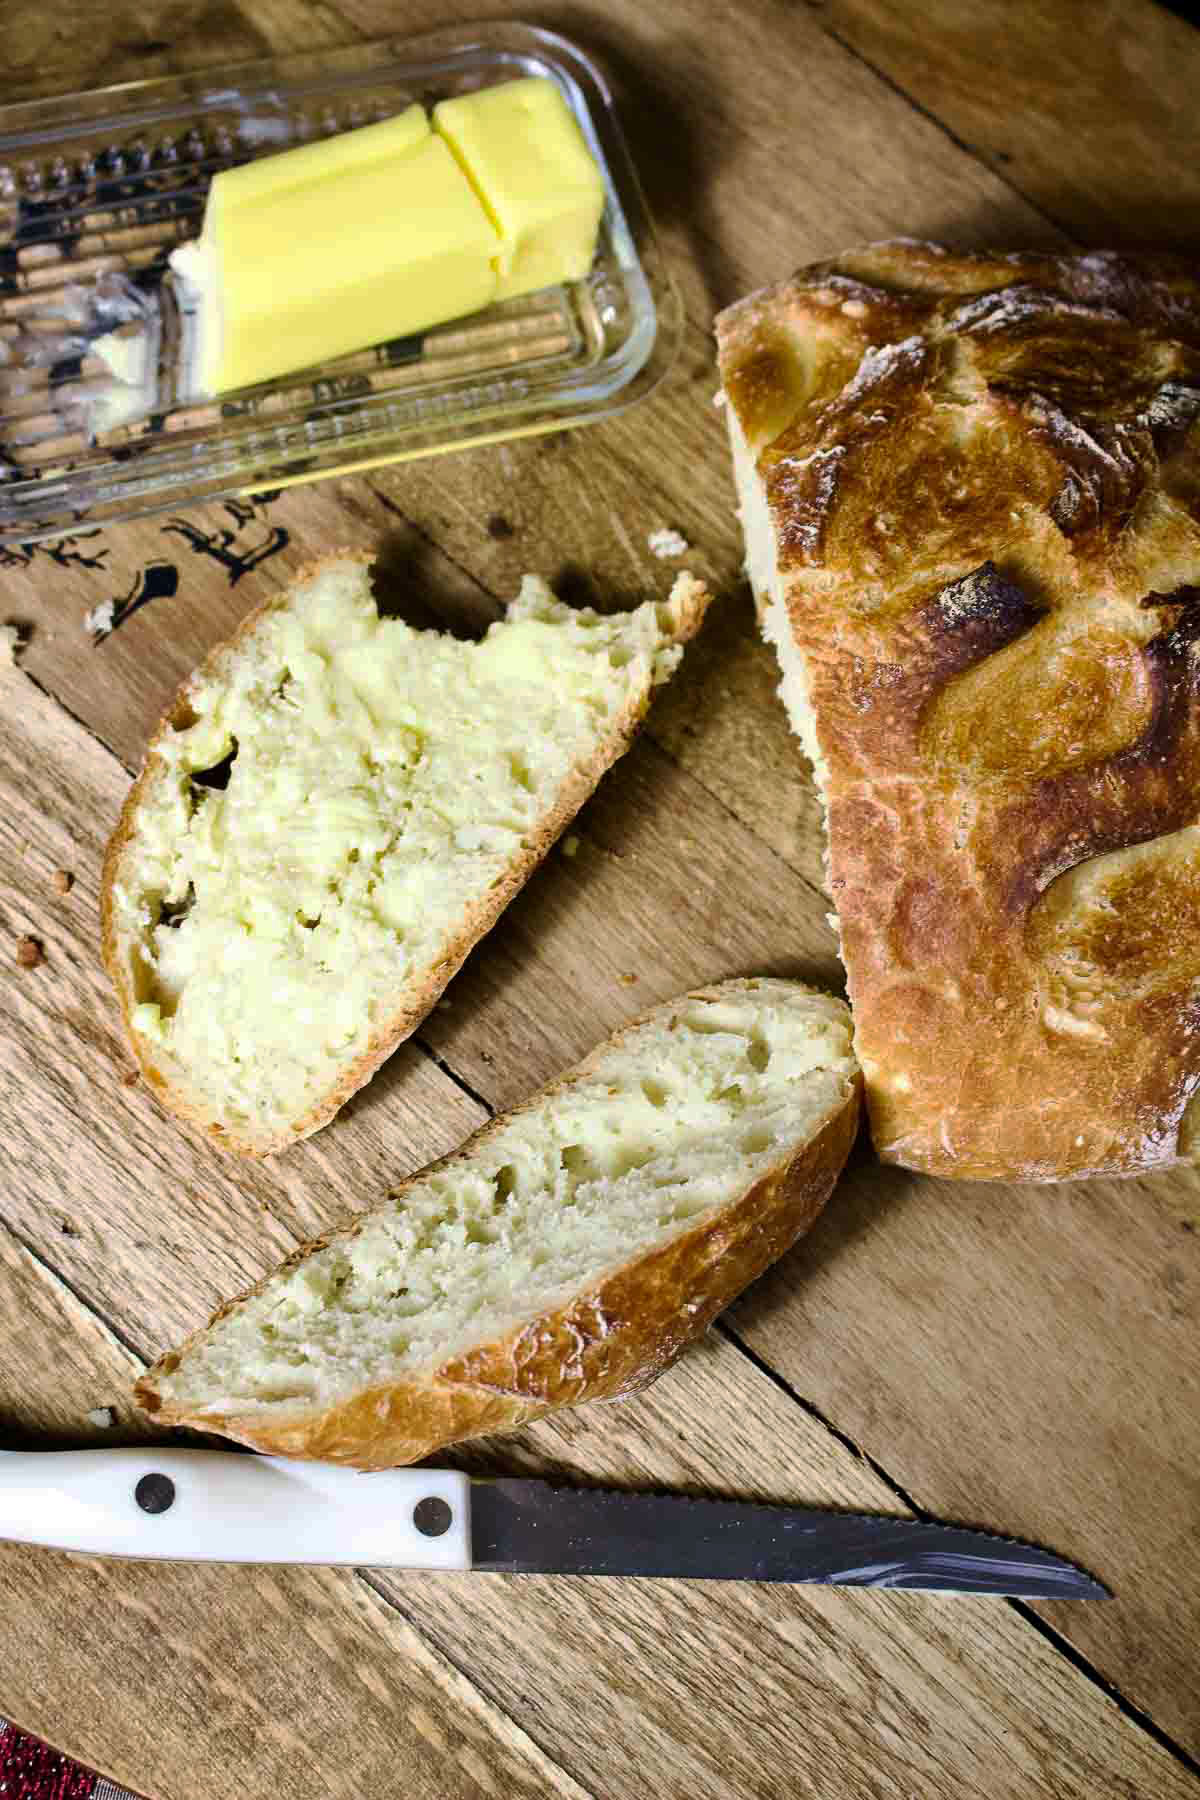
This easy no-knead Dutch oven bread is a simple homemade bread recipe with a crisp crust and a soft, chewy interior. The dough comes together in minutes with only four basic ingredients and no kneading required.

You can make it with the traditional overnight rise for deeper flavor, or use the faster same-day method when you need fresh bread sooner. Both versions bake beautifully in a Dutch oven and produce a loaf that tastes like bakery bread with very little effort.
I have been making this recipe for years because it is reliable, forgiving, and works for everything from soup and sandwiches to warm slices spread with butter.
As a food blogger with over a decade of experience, my kitchen has seen countless loaves of bread. Yet, despite my love for that warm, crusty slice slathered in butter, I've always been less enthusiastic about one thing: kneading. The mess, the time, the elbow grease, it just wasn't my cup of tea.
That's why discovering the no-knead bread method was a game-changer for me, and I'm thrilled to share this simple, foolproof recipe with you.
Jump to:
Why I Love This No-Knead Bread
This famous bread method became popular after Jim Lahey and Mark Bittman introduced it to home bakers through The New York Times. The long rise develops flavor and structure naturally, giving the bread its classic bakery-style texture without complicated techniques.
- No kneading or mixer required
- Crispy crust with a soft, chewy center
- Made with only 4 basic ingredients
- Overnight and same-day methods included
- Beginner-friendly and very forgiving
- Perfect for sandwiches, soups, or toasted with butter
The Essential Ingredients

- All-Purpose Flour: I usually opt for all-purpose flour because it's versatile and yields a light, airy crumb. However, you can experiment with bread flour for more chewiness or mix in some whole wheat flour for a nuttier flavor. If using whole grains, consider substituting up to one-third of the all-purpose flour to maintain a good texture.
- Instant Dry Yeast: Just a quarter teaspoon is all you need. Although it may seem like a small amount, the long fermentation period allows the yeast to develop flavor and structure without needing more.
- Fine Sea Salt or Kosher Salt: Salt enhances the flavor and strengthens the gluten structure. If you're using kosher salt with larger grains, you might need a little more to achieve the same seasoning effect.
- Cold Water: Using cold water slows the fermentation, allowing for better flavor development. If you're in a hurry, you can use warm water (around 100°F or 38°C) to speed up the process, reducing the initial rise time to about 3-4 hours.
- Add-Ins(Optional): Enhance your bread with herbs like rosemary or thyme, add a handful of seeds, or mix in some shredded cheese or chopped olives for extra flavor.
Simple Steps to Homemade Bread
Mixing the Dough: In a large bowl, combine your dry ingredients, flour, salt, and yeast. Add the water and stir until you have a shaggy, sticky dough. There's no need for kneading; just make sure all the flour is incorporated. The dough will look wet and messy, but that's exactly what you're aiming for.
The Long Rise: Cover the bowl with plastic wrap or a clean kitchen towel and let it sit at room temperature for 12 to 18 hours. This long, slow fermentation is where the magic happens, developing flavor and gluten structure without any effort on your part.
Shaping Without Kneading: After the dough has risen and is bubbly on the surface, generously flour your work surface and hands. Gently turn the dough out and fold it onto itself a couple of times to shape it into a ball. Remember, we're still avoiding any heavy kneading here.
Preparing to Bake: While shaping the dough, preheat your oven to 450°F (230°C) with a Dutch oven inside. Heating the pot is crucial for that crispy crust. If you don't have a Dutch oven, any heavy pot with a lid will do, as long as it's oven-safe at high temperatures.
Baking to Perfection: Carefully transfer the dough into the hot Dutch oven. You can use parchment paper to make this easier and to prevent sticking. Bake with the lid on for 30 minutes to create steam, which helps the bread rise and develop a beautiful crust. Then remove the lid and bake for an additional 15-20 minutes until the crust is golden brown.
You can also use a thermometer to check the temperature inside the bread. It should be between 200 and 210 degrees Fahrenheit.
Note
The parchment paper is not mandatory. I used it so I didn't have to clean the pot after baking.
SECRET: If you want to bake the bread the same day, instead of adding cold water to the flour, add warm water at about 96-100F. Follow the same process and let it rise for about three hours. The warm water will speed up the rising process.

Troubleshooting Tips
1. Sticky Dough or hard to handle: This is normal for no-knead bread. Resist adding more flour, as it can make the bread dense. Instead, lightly flour your hands and work surface to manage the dough.
2. Dense Loaf: It could be insufficient fermentation time. Ensure you allow the dough to ferment for the recommended 12-18 hours. The long rise naturally develops gluten, contributing to a lighter loaf. Another cause could be that you added too much flour. Stick to the recipe measurements and handle the dough gently.
3. Bread Is Slightly Wet Inside: If the interior is soggy or undercooked, it could be your oven. Sometimes, ovens are not calibrated, which causes temperature fluctuations and uneven baking. The solution is to use an oven thermometer to check if your oven reaches and maintains the correct temperature.
Another cause could be incorrect measuring. Use a kitchen scale for precise measurements. One cup of all-purpose flour should weigh about 125g. And finally, you need to allow the bread to cool for at least an hour, as cutting it too soon traps steam and makes the crumb soggy.
How to store
I usually keep it wrapped in parchment paper on the kitchen counter. It is good for up to three days unless you eat it on the first day, as we sometimes do. It is perfect for sandwiches.
Also, old bread is perfect for making croutons that are perfect for soup, like this Italian Ribollita Soup (Tuscan White Bean Soup).
Frequently Asked Questions
Yes, you can use any oven-safe pot with a lid.
While a longer rise can develop more flavor, exceeding 24 hours may cause the dough to over-ferment, leading to a collapsed loaf with a sour taste.

More Bread Recipes To Love
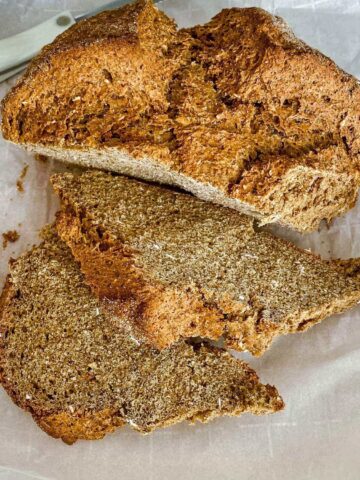
- Brown Bread Recipe
- Traditional Irish Brown Soda Bread With Molasses
- Savory Quick Bread With Cheese And Olives
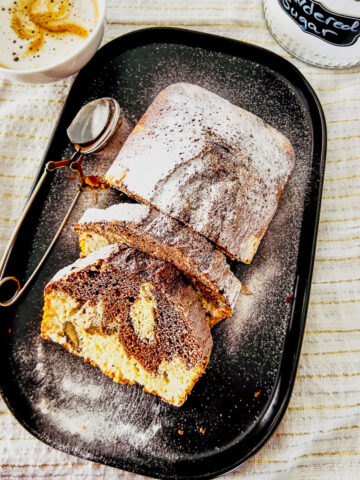
- Buttermilk Apple Brown Bread
- Whey Bread Recipe With Sprouted Spelt
From The Same Bread Category

📖 Recipe

Easy No-Knead Dutch Oven Bread (Overnight Recipe)
Equipment
Ingredients
- 3 cups all-purpose flour
- 1 ½ teaspoon salt
- ¼ teaspoon dry yeast
- 1 ½ cups cold water
- flour for dusting
Instructions
- Grab a bowl and place the flour, salt, and yeast together. Stir them together.
- Add the water and mix with a spoon or by hand to incorporate the water into the flour.
- Do not overmix, and do not add more flour. The dough is supposed to be wet.
- Cover the bowl with plastic wrap.
- Let it rise at room temperature for 12-18 hours. More time, better results.
- The next day, preheat the oven to 450F and place the cast iron pot inside the oven. You need it blazing hot.
- Dust the work surface with flour and place the dough on it.
- Flatten the dough and wrap it like an envelope by bringing the sides toward the middle.
- Cover the bottom of a bowl with parchment paper.
- Place the dough on the parchment paper and let it rise again, covered, until the oven reaches 450°F.
- Place the dough on the parchment paper and into the hot cast iron pot.
- Cover with the lid and place the pot in the oven.
- Bake for 30 minutes at 450F.
- Remove the lid(carefully) and bake the bread uncovered for another 20 minutes until the surface of the bread reaches the desirable color(golden brown or dark brown). Use a thermometer to check the temperature inside the bread that should be 200-210F.
- Allow it to cool on a metal rack for at least an hour. This bread needs to cool down before you slice it.
- Keep it covered on the kitchen counter for up to 3 days. Use the leftovers to make croutons.


Linda Graff says
Was wondering if I wanted to make a long loaf of bread but it won’t fit inside the pot I have, can I use a cookie sheet and foil to bake? Thank r just put on baking pan and how much ch time to bake it, (kinda the size of a skinny French loaf)
Thank you,
Linda
The Bossy Kitchen says
I guess you can do that, just make sure the foil allows the bread to rise. The reason you would use a covered Dutch oven or a pot that is covered is to create a steamy environment for the bread to rise and get that crisp crust. If you use the same amount of ingredients, I would bake it as long as the recipe tells you. However, because I never tried your method, I cannot tell you that you will get the same results.
Joseph says
great have made it Question can I add 5 whole grain mixture to this recipe. If so when do I add it
Joseph says
great have made it Question can I add 5 whole grain mixture to this recipe. If so when do I add it
Steve says
Thank you for this recipe. I've made it twice now and both times the finished product feels slivhtly sticky inside once cooled and sliced. Is this normal? The texture is a little wierd, almost boarding on an English style crumpet.
The Bossy Kitchen says
Hi, there are a few reasons why this is happening to you:
1. You cut the bread while still hot.
2. Too much water and not enough flour. I added the amounts of water and flour in grams and also in ounces. A good scale would help measuring the ingredients correctly. Cups are not always reliable.
3. The oven is not calibrated. The bread might bake too fast on the outside and not enough inside.
4. Use a thermometer to check the bread inside. It should be somewhere between 200-210F.If it is lower than that, you need to bake it more.
Barbara Conley says
My husband loves this bread! I had never made bread before and this turned out so great! You somehow need to have your name on the print page. I was trying to tell a friend about the bread and could not remember the name of your page. Finally found it and will definitely remember from now on. I will be checking out some of your other recipes. Thank you for this great bread recipe!
Gigi says
This is one my favorite recipes on your blog. We also make it often, and I give this recipe to all new bread bakers! It's so easy.
Gabriela says
Thank you, Gigi! I love this bread as well and make it very often.
Laura Bogorin says
This was my first time ever making bread from scratch, and I honestly can’t believe how easy and amazing this recipe is. The fact that it’s no-knead made it feel totally doable, even for a beginner like me. The bread turned out incredible: soft on the inside, perfect on the outside, and the taste is unbelievable. I’m genuinely so proud of myself and so grateful for this recipe. If you’ve been intimidated by bread baking, this is the one. I will 100% be making this again! Thank you for this recipe!! 💕💕
Gabriela says
Thank you, Laura! I am happy you enjoyed making this recipe. I make this recipe very often as well. Happy baking and welcome to the "No kneading bread making club"! 🙂
Deb says
Hey, your recipe begin with 3 cups. 3 cups of what and how much yeast do you use?
Gabriela says
Thank you so much for letting me know. It looks like some sort of a glitch between Amazon products linked to the ingredients and the article, making the ingredients invisible to the reader. Now it is fixed and visible to you. Thanks again for letting me know! I truly appreciate it!