
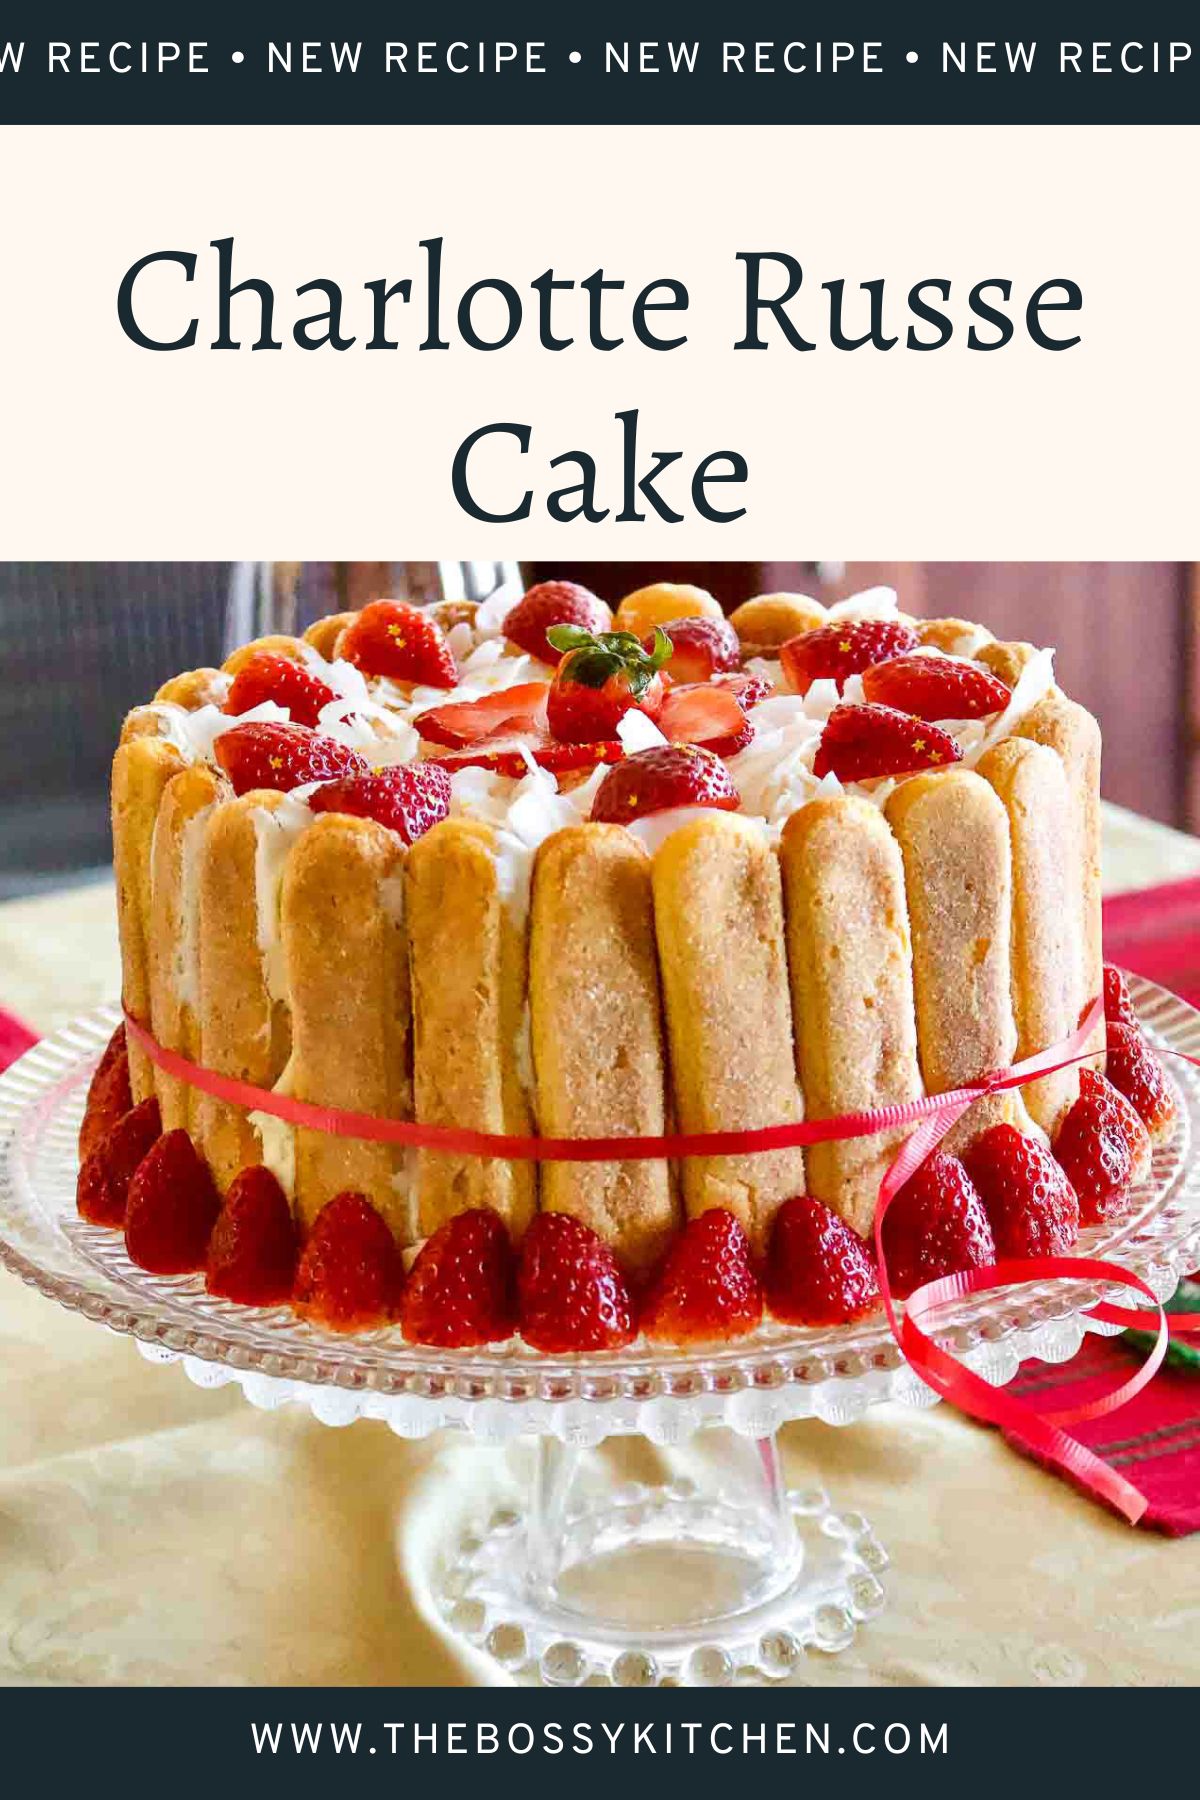
The Charlotte Russe Cake is a classic European recipe that dates back to the 18th century. This delicious dessert is made up of layers of ladyfingers, Bavarian cream, and fruit. This is a no-bake dessert, which makes it perfect for any occasion when you don't want to heat up your oven.
Jump to:
A short history of this cake
This cake has become very popular worldwide and is a great dessert to serve at any gathering, whether it's a birthday, holiday, or just a get-together with family and friends.
Originally, Charlotte Russe was known as a cake made of ladyfingers pressed into a mold, filled with thick custard or Bavarian cream, and flavored with cooked fruit, spices, or brandy.
However, it gained even more popularity thanks to an episode of Downton Abbey where Ethel, Isobel's cook, made this dessert for a luncheon.
If you're a fan of no-bake desserts, the Charlotte Russe Cake is definitely worth trying. You can easily whip it up in your own kitchen and impress your family and friends with your pastry-making skills.
What's great about this Charlotte Russe Cake is that it can be put together in less than two hours without using the oven. You can also decorate it with seasonal fruits of your choice. It's a perfect dessert for any occasion!
Light and delicious, full of different textures and flavors, this cake is a keeper and deserves a place in your recipe book collection. Try it, and you will not be disappointed.
How To Make This Cake
For this recipe, start with an 8-inch springform cake pan. Using a different size will require you to modify the ingredient quantities. To avoid a cake that's only half-filled, increase the custard amount for a larger pan.
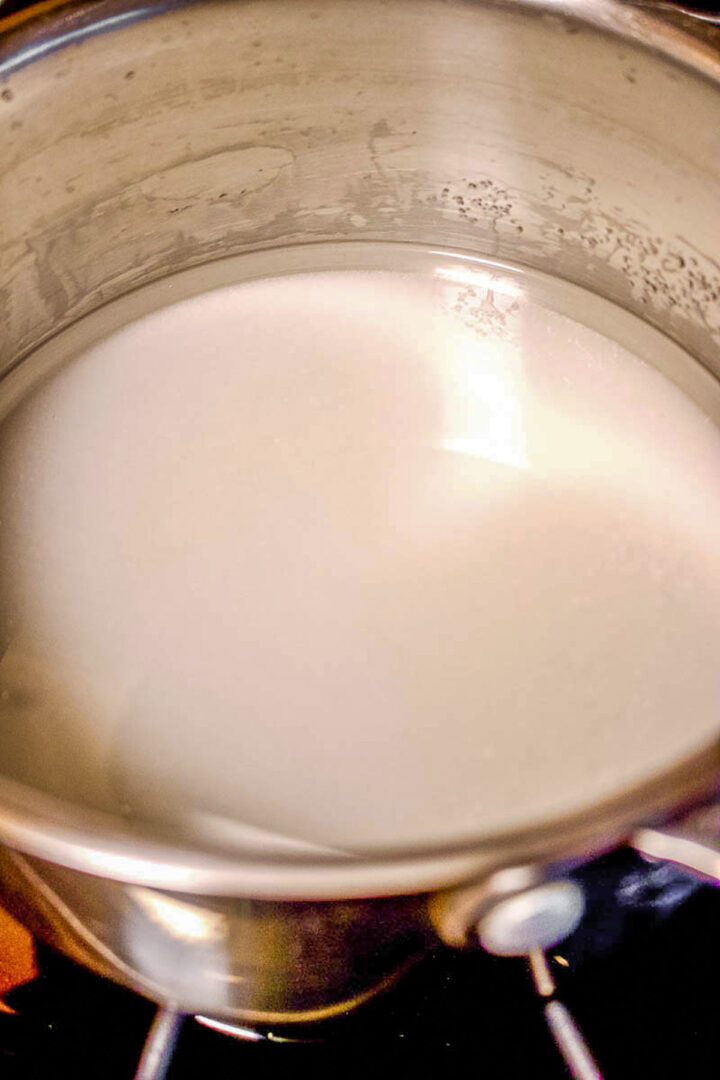
Step 1. The Syrup: This is an effortless step. In a medium pot, mix sugar and water, bring to a boil, and simmer for 2-3 minutes until the sugar is dissolved. Remove from the stove and flavor the syrup with rum extract.
Note: Do not add the rum extract while simmering the syrup, as the flavor will dissipate.
Let the syrup cool down. This syrup will be used to steep the ladyfingers in it. If you add ladyfingers to hot syrup, they will fall apart.
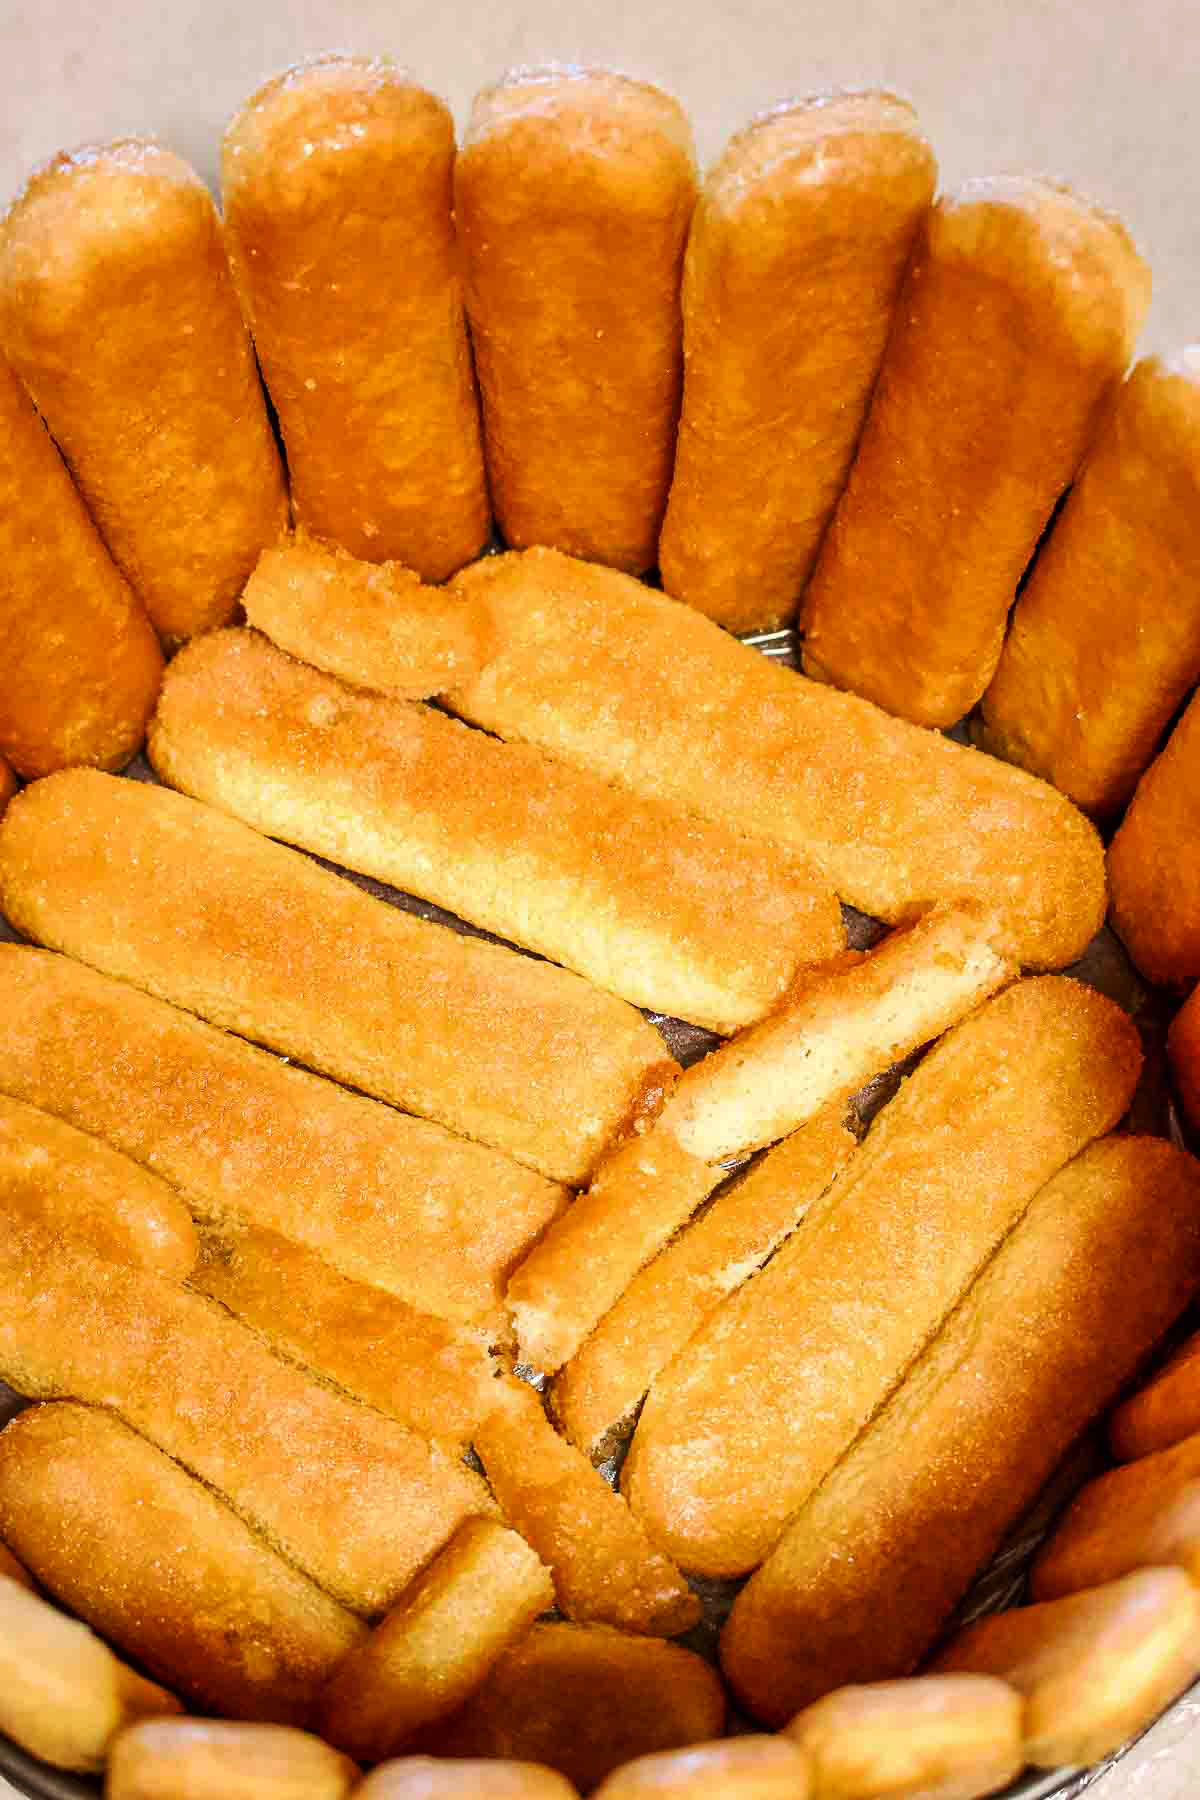
Step 2. Prepare the pan and the ladyfingers. Line the bottom of the springform with cling wrap. Steep the ladyfingers in the syrup and line the sides of the springform with them. Place them tightly together. (You will probably need 20-25 ladyfingers)
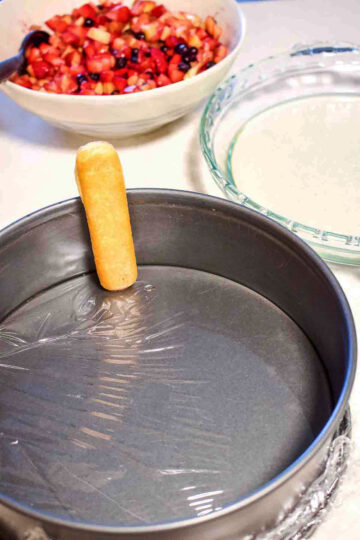
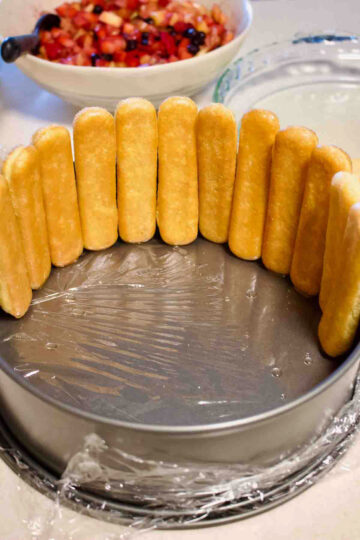
Step 3. Cover the bottom of the pan with ladyfingers. Line the bottom of the springform with ladyfingers that you steeped in the syrup. Set aside.
Step 3. Make the cake filling
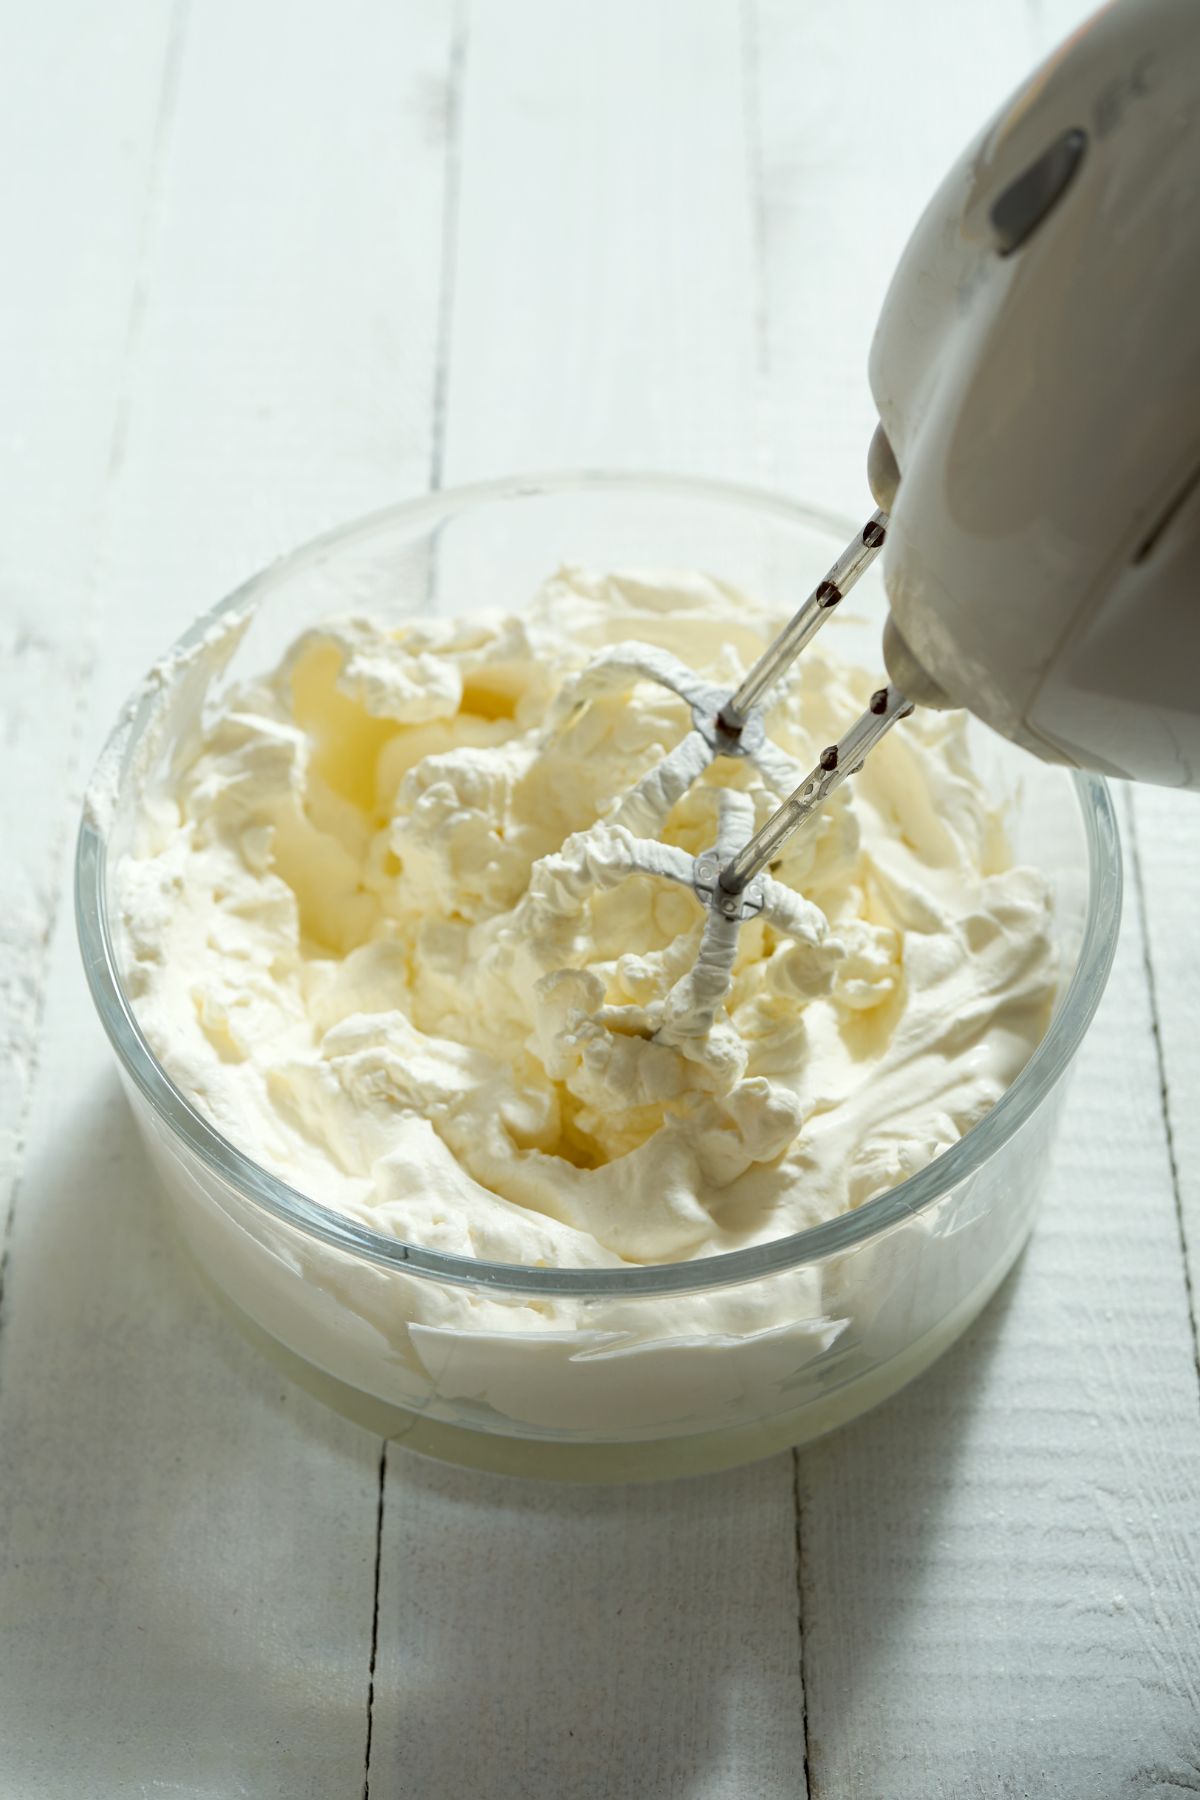
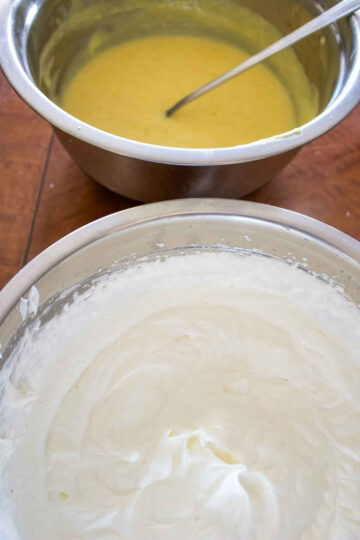
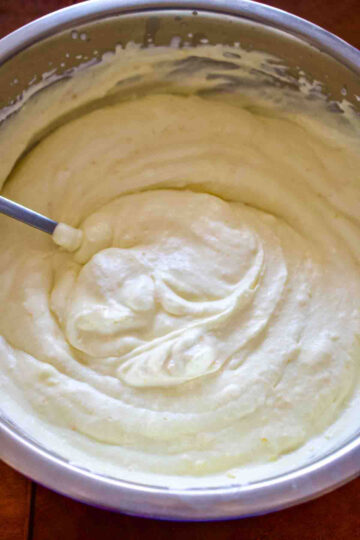
Whipped Cream: Place mixer bowl and whisk in the freezer for at least 20 minutes to chill. The heavy cream will beat faster if everything is very cold. Pour heavy whipping cream and vanilla into the cold bowl and whisk on high speed until medium to stiff peaks form, about 1 minute. Do not overbeat. Set aside.
Bavarian Cream: First, hydrate the gelatin. Mix the gelatin with water in a small bowl and set aside.
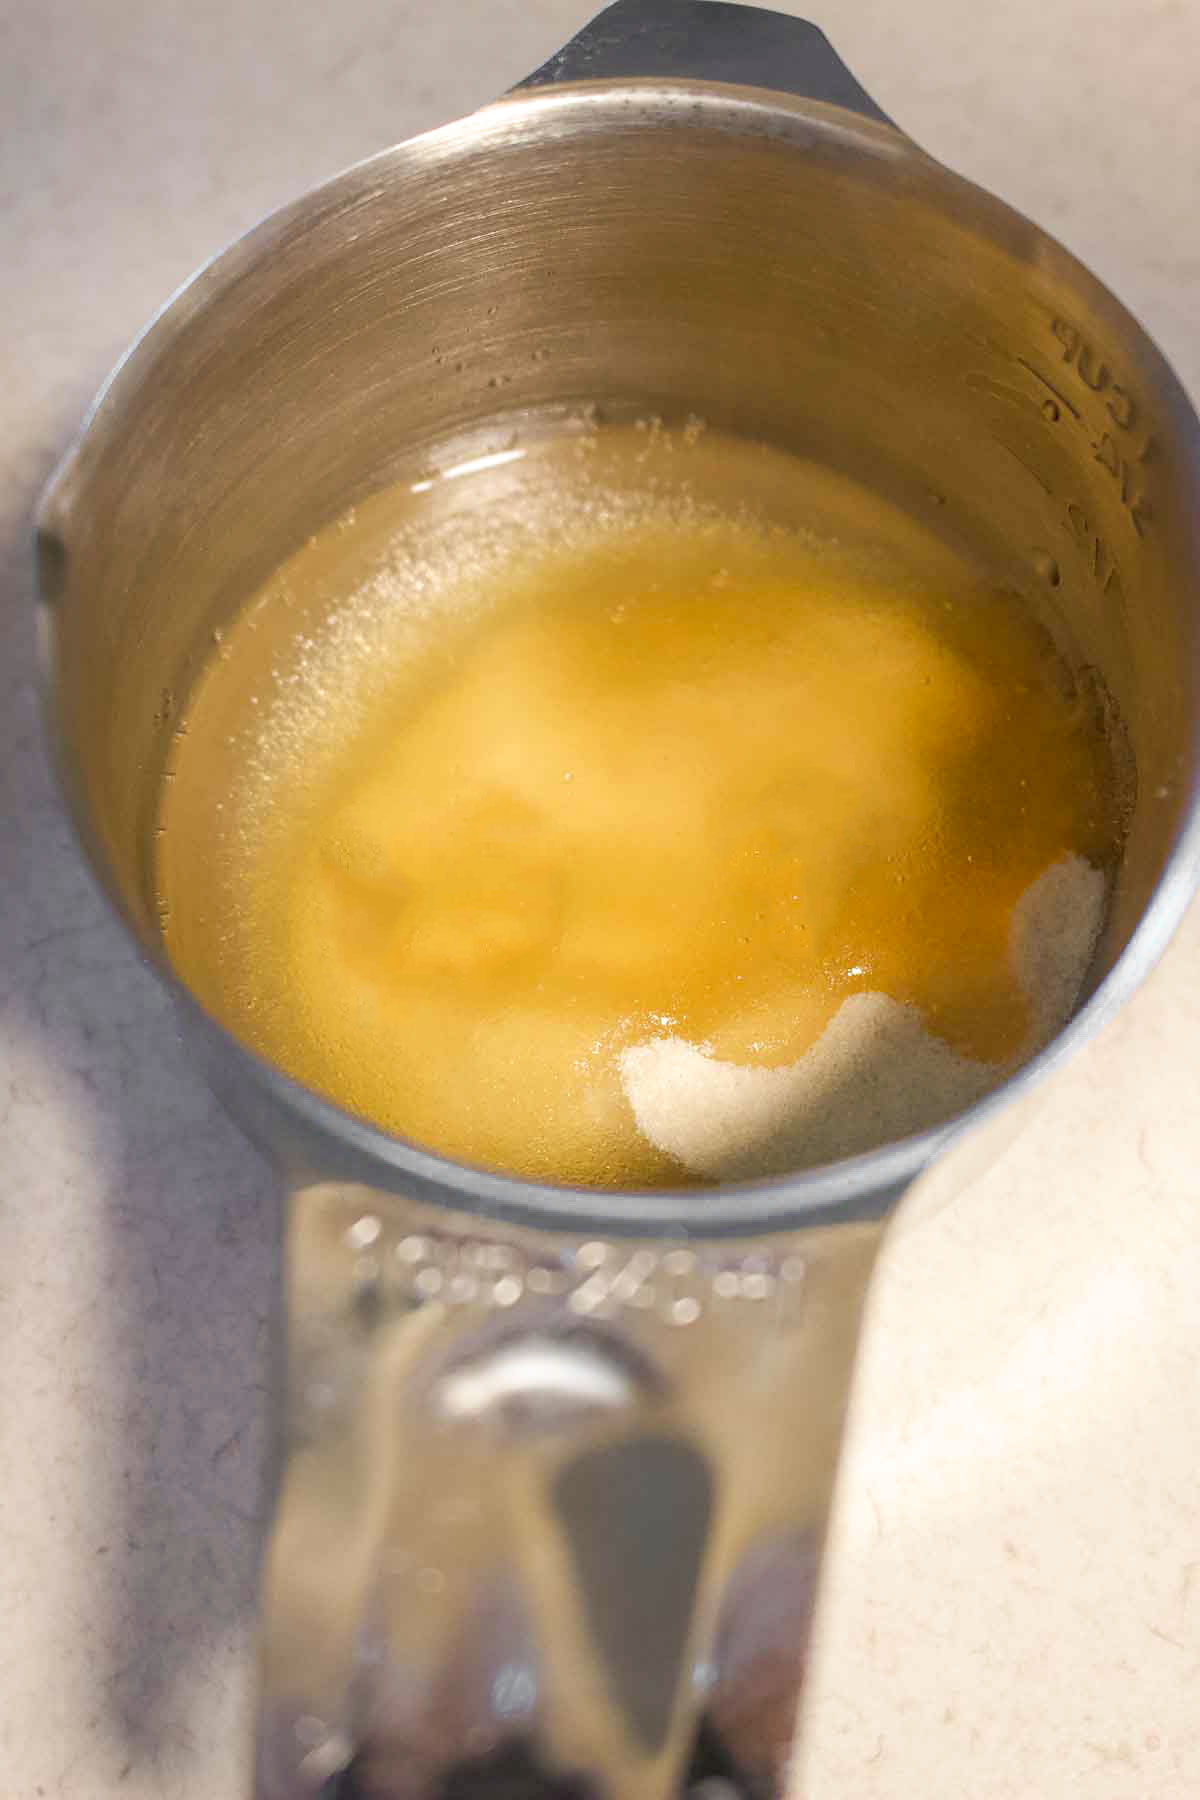
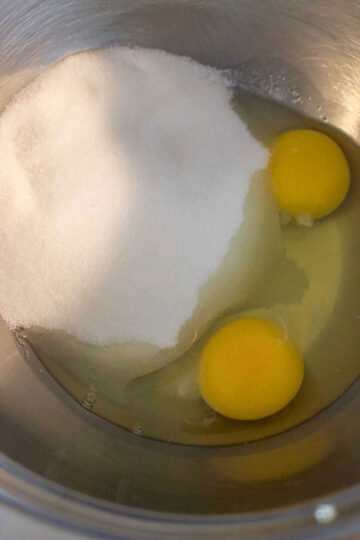
In a medium pot, mix the eggs with the sugar. Add milk.
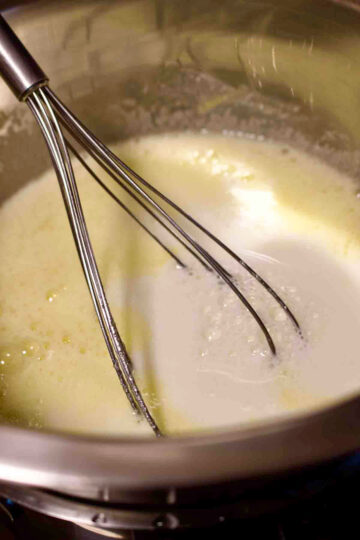
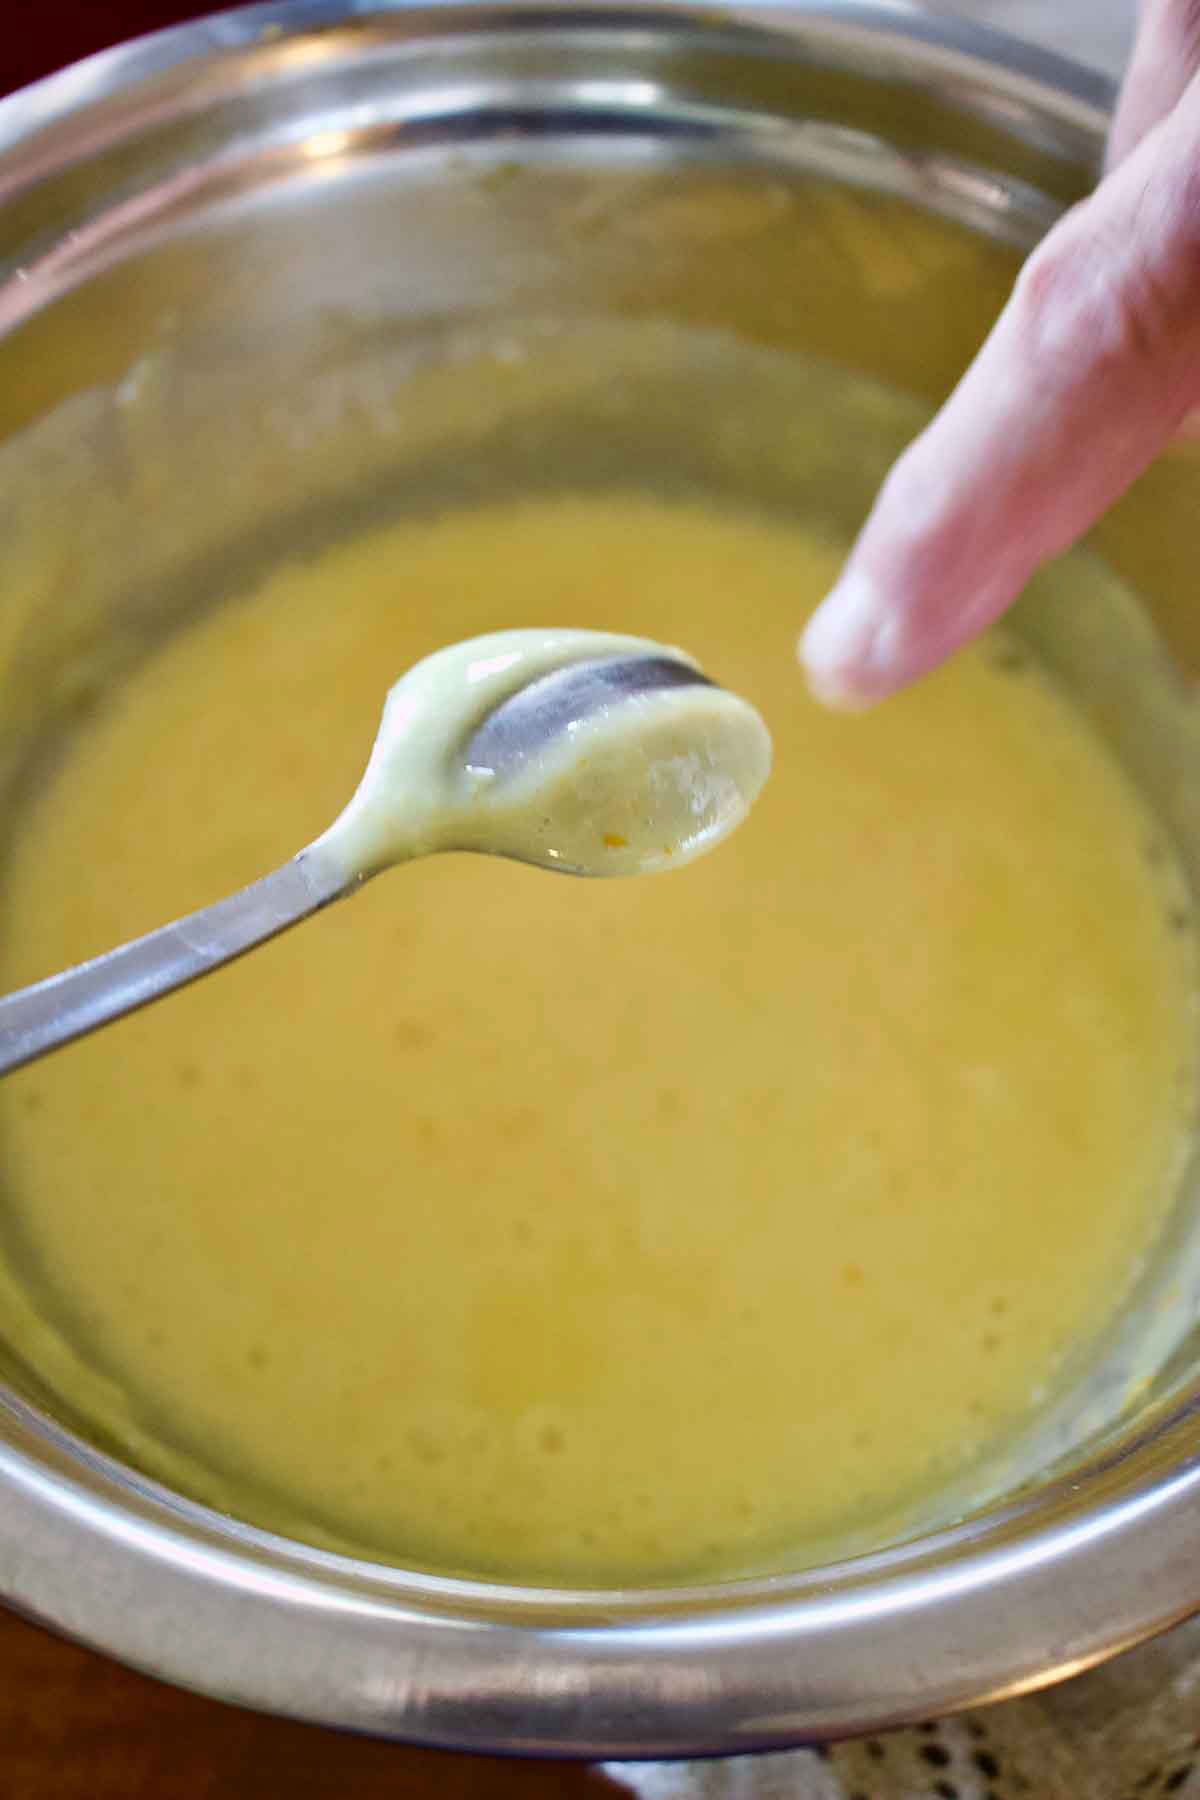
Place the pot on Bain-Marie and constantly stir until the first signs of boiling. At this point, the eggs are cooked enough, and the custard should cling to the spoon.
Remove and add the hydrated gelatin. Mix continuously with a wooden spoon until the mixture is completely cool and the gelatin is dissolved.
Add the whipped cream and blend together. Add the candied fruit and mix well.
How to assemble the cake
Pour half the filling on the bottom of the cake over the ladyfingers. Cover the filling with another layer of ladyfingers soaked in the syrup. Pour the rest of the filling over the ladyfingers and smooth the surface with a cake spatula.
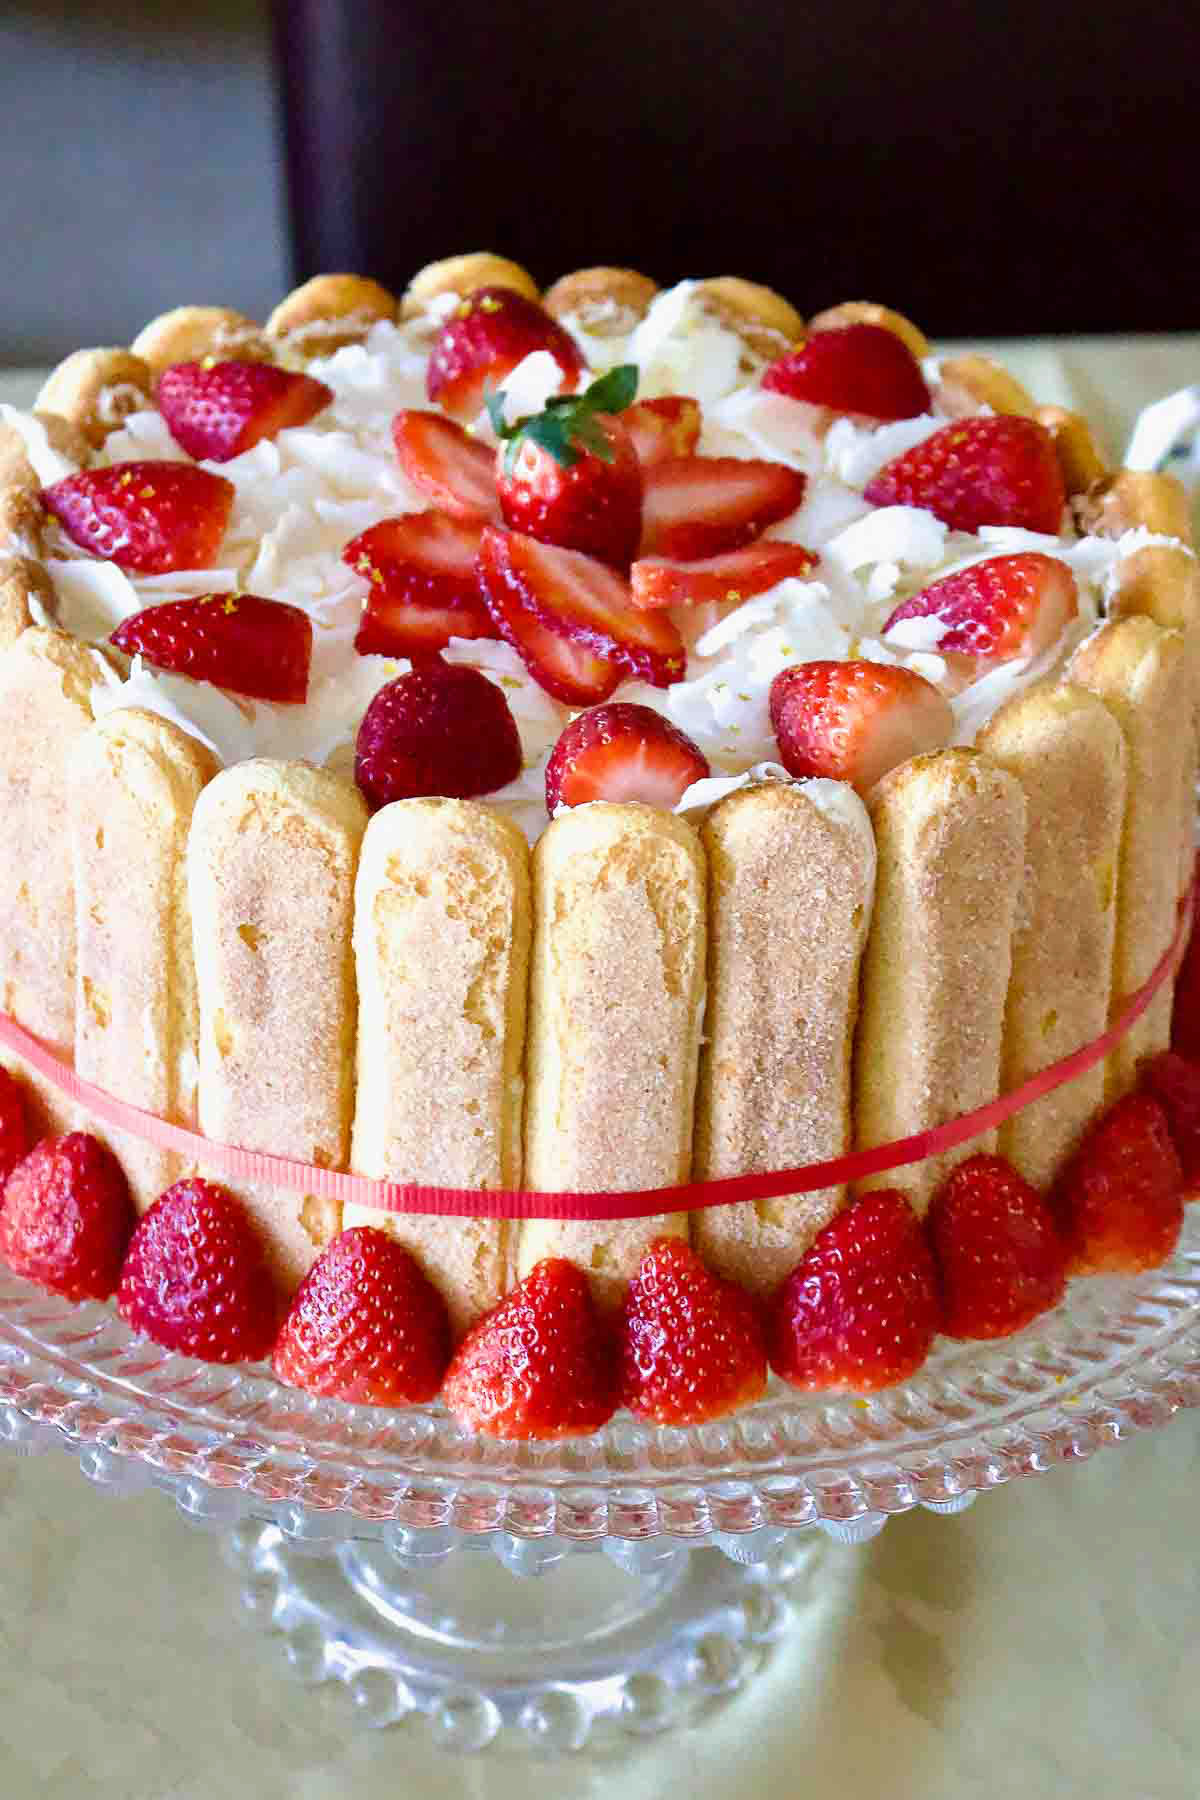
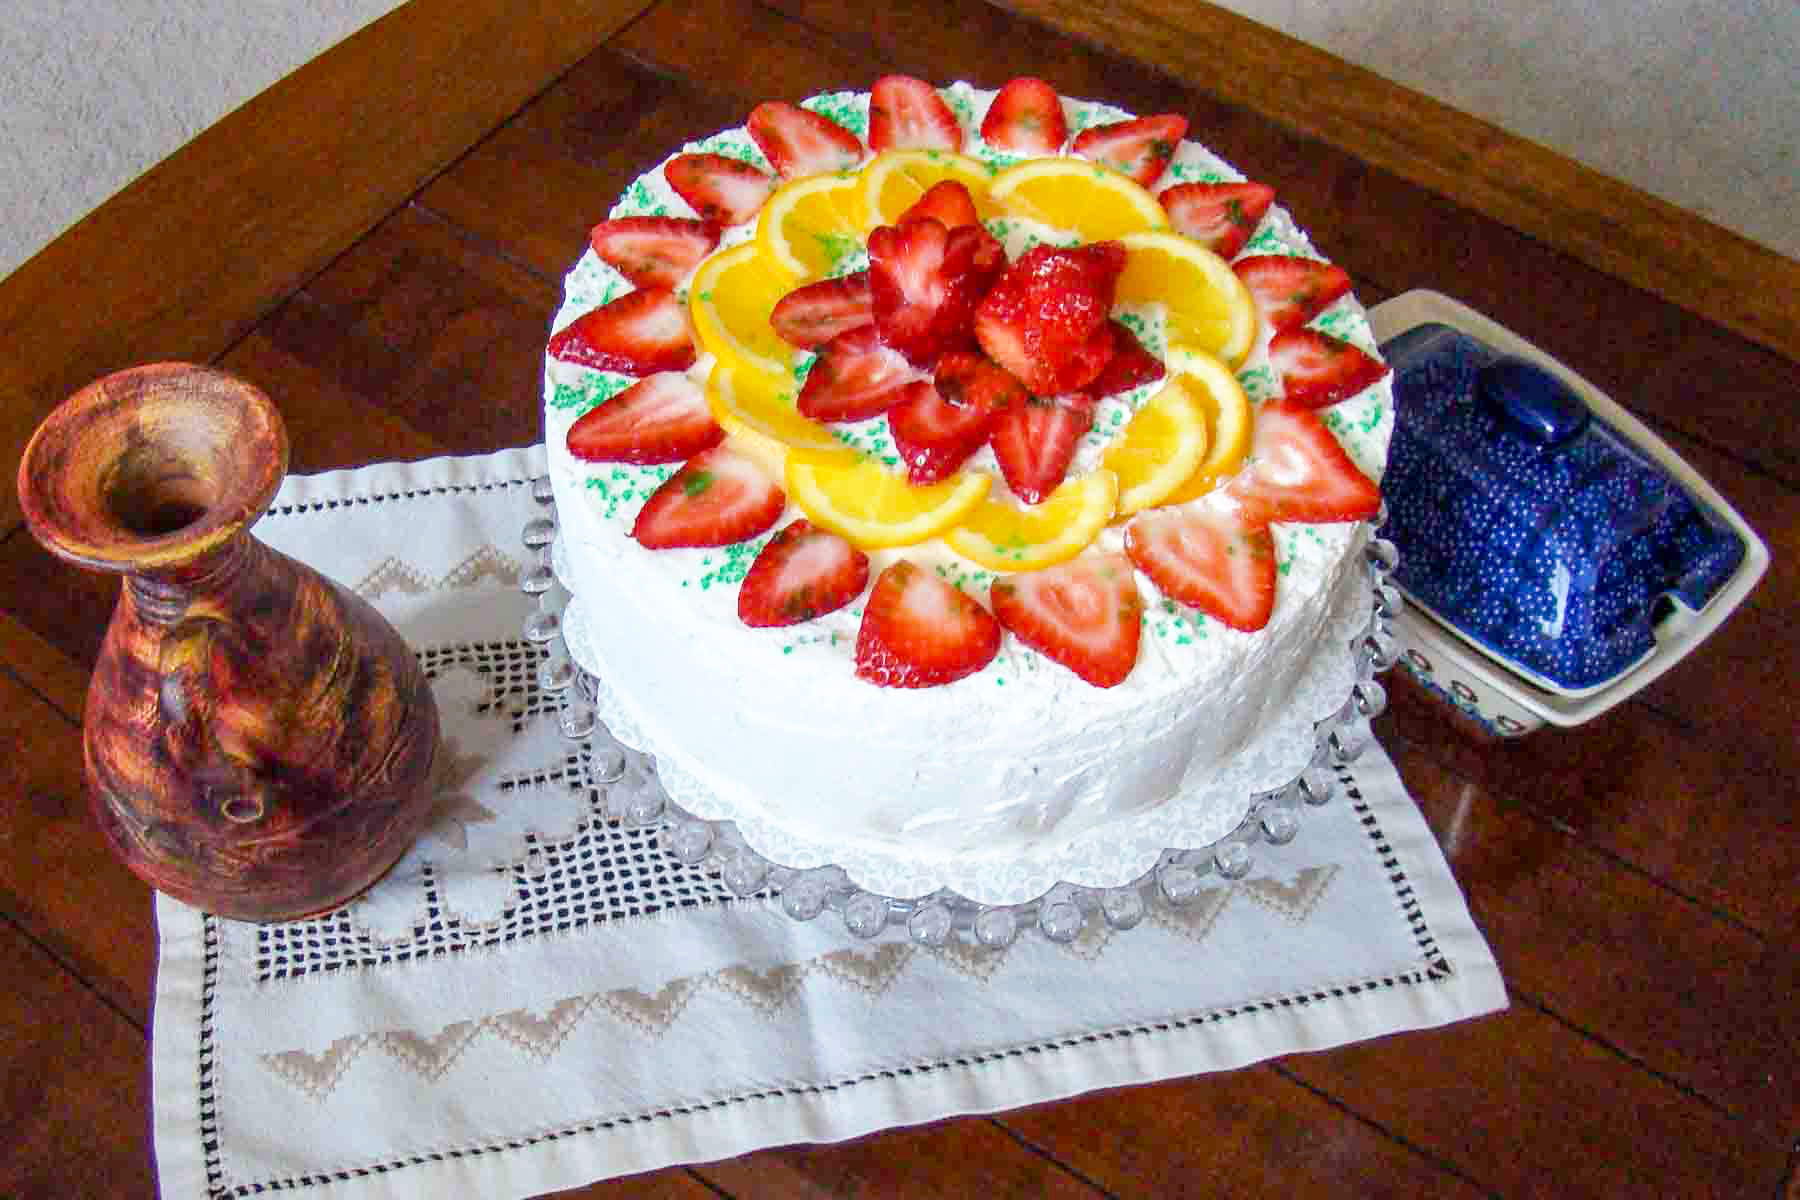
Place it in the refrigerator for a few hours or, better, overnight. The next day, carefully remove the edges of the springform and place the cake on a platter using a spatula. Decorate it with fruits, more whipped cream, sprinkles, etc.
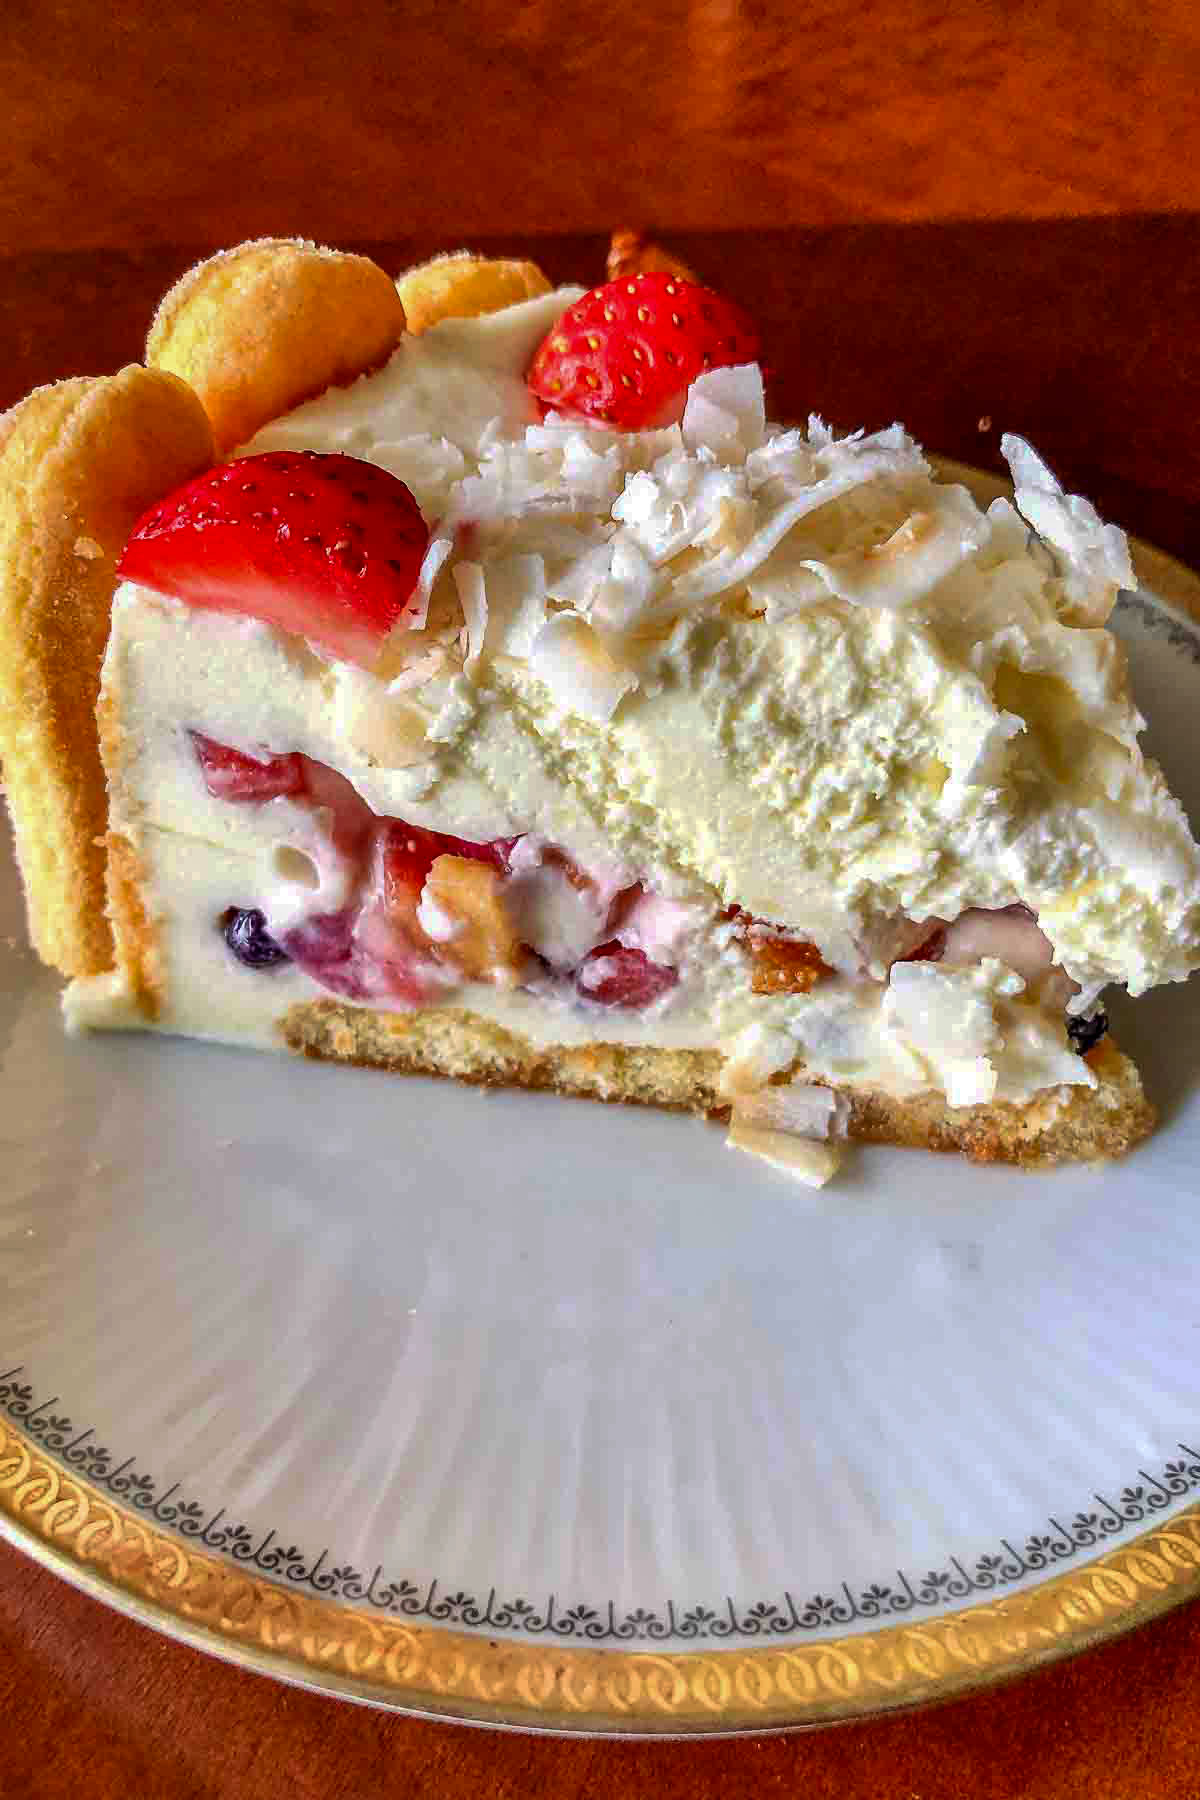
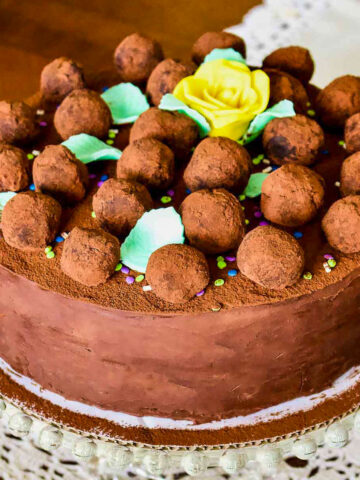
This is how the cake looked like when, instead of adding candied fruits(suitable for winter), I used fresh fruit (in the summer).
This cake needs refrigeration. Place it in an airtight container for up to four days. Do not freeze.
More No-Bake Cake Recipes

📖 Recipe
Charlotte Russe Cake- Classic European Recipe(No Bake)
Ingredients
- 30-35 ladyfingers use 20-25 ladyfingers for the sides of the cake, the rest will be used for the bottom
For the syrup:
- ¾ cup granulated sugar
- ¾ cup water
- 1 teaspoon vanilla extract
Custard:
- 2 ¼ cups heavy cream
- 2 ½ envelopes Knox gelatine OR 28 g of Gold sheet gelatin see notes
- 4 tablespoons cold water
- 1 cup granulated sugar
- 5 large eggs
- 1 teaspoon vanilla extract
- 1 cup whole milk
- ½ cup candied fruit OR 1 cup fresh fruit, like strawberries,blueberries, raspberries, cherries peaches etc chopped small.
- Optional: Fresh Fruit for decoration
Instructions
- You need an 8-inch springform cake pan.
- Prepare the syrup: Bring to a boil the water mixed with sugar and simmer for 2-3 minutes.
- Remove from the stove and flavor the syrup with rum extract. (do not add the rum extract while simmering the syrup as the flavor will dissipate)
- Let the syrup cool down. ( If you add ladyfingers to hot syrup, they will fall apart.)
- Steep the ladyfingers in the syrup and line the sides of the springform with them. Place them tightly together. (You will probably need 20-25 ladyfingers)
- Line the bottom of the springform with ladyfingers steeped in syrup as well.
How to make the Bavarian Cream:
- Make the whipped cream: Place mixer bowl and whisk in the freezer for at least 20 minutes to chill.
- Pour heavy whipping cream and vanilla into the cold bowl and whisk on high speed for about a minute until medium to stiff peaks form. Do not overbeat. Set aside.
- Make the custard: Start by hydrating the gelatin. Mix gelatin with water in a small bowl and set aside. If you use gelatin sheets, squeeze the water after it gets hydrated.
- In a medium pot, mix the eggs with the sugar. Add milk.
- Place the pot on Bain-Marie and constantly stir until the first signs of boiling. It should look like a thin mayonnaise. At this point, the eggs are cooked enough, and the custard should cling to the spoon.
- Remove and add the hydrated gelatin. Mix continuously with a wooden spoon until the gelatin is completely dissolved. Allow it to cool for 30 minutes at room temperature.
- Add the whipped cream and blend them.
- Add the candied fruit and mix well.
How to assemble the cake:
- Pour half the filling on the bottom of the cake over the ladyfingers.
- Cover the filling with another layer of ladyfingers soaked in the syrup.
- Pour the rest of the filling over the ladyfingers and smooth the surface with a cake spatula.
- Place it in the refrigerator for a few hours or better overnight.
- The next day, carefully remove the edges of the springform and place the cake on a platter. Decorate it to your taste with fruits, more whipped cream, sprinkles, etc.
Notes
- 120 (titanium)
- 140 (bronze)
- 160 (silver)
- 200 (gold)
- 230+ (platinum)
Dana.J says
Gabriela I can’t wait to make this, can you please help me out a bit? I have inconsistent results with mixing the gelatin with the custard. Or the whipped cream. I know it’s not the case here but I just said to let you know how bad I am at that. Anyway, at my last attempt I’df mixing custard with whipped cream and gelatin the gelatin didn’t thoroughly dissolved or mixed properly, there were small chunks of gelatin throughout the cream. Help!!! What am I doing wrong?
Thank you for help.
Dana.
The Bossy Kitchen says
Hi Dana, in this recipe in particular, the gelatin is dissolved in the warm custard, therefore, if you mix it quickly, you should not end up with any chunks of gelatin.As a rule, if you mix the cold, bloomed gelatin into the warm custard, no problem. If the gelatin is warm (as you bloom it first, then you warm it up on the stove in a very little water until dissolves/or microwave it for 15 seconds) try to add it to the cream just when the mixer beaters begin to leave a trail in the cream. Slowly pour in the gelatin mixture and then increase the speed to high and continue to beat until soft peaks form. This way you should end up with a smooth final product.Hope this helps. Good luck!
DanaJ says
Many thanks, I’ll do that. I had a birthday here on Sunday so I baked a giant cake, but this one is next on the list. Mulțumesc din nou. O zi buna îți doresc.
Dana.
Denise says
What I like about your recipe that other recipes do not have is that your recipe cooks the egg. I prefer this to a non-cooked egg version of Charlotte. Thanks.
The Bossy Kitchen says
Hi Denise, So glad you enjoyed the recipe! I am with you, uncooked eggs in a cake is not a safe way to go.
Andrea Frost says
I can’t wait to make this recipe.
Do I soak the ladyfingers for the sides in the simple sugar or just the ones for the bottom?
Thank you
The Bossy Kitchen says
Hi Andrea, You will find that information under the instructions on how to make the cake: "Steep the lady fingers in the syrup and line the sides of the springform with them. " So, yes, you will need to soak the ladyfingers for the sides as well. Let me know how the recipe worked for you. 🙂
Sarah says
Hi making ur recipe right now. In your instructions you say add the egg to the milk in the saucepan but it doesn't say if I should separate the yolk from the egg white. am I supposed to mix the egg white and egg yolk together with the milk or separate the yolk from the egg white?
The Bossy Kitchen says
Hi Sarah, Do not separate the eggs. The instructions are telling you: "In a medium pot mix the eggs with the sugar.
Add milk.
Place the pot on Bain-Marie and stir constantly until the first signs of boiling. At this point the eggs are cooked enough and the custard should cling to the spoon. "
I replaced the yolks(typo) with the eggs. I hope that makes sense now.
Alaina Kitzman says
Okay, so what does it mean when it says I have to 'steep' the ladyfingers?
The Bossy Kitchen says
steep
/stēp/
1.soak (food or tea) in water or other liquid so as to extract its flavor or to soften it.
"the chilies are steeped in olive oil"
K.B. says
Hello. I have having a hard time finding the dried candied fruit. Can the cake be made without it?
The Bossy Kitchen says
Hi! Yes, you can! Use fresh fruit instead, or canned, but make sure you drain the fruits very well. DO NOT USE fresh kiwi, pineapple, mango or papaya, because they have some enzymes that will destroy the gelatin and the cake will not set. If you want to use these fruits in particular, use canned and drained very well. Otherwise, berries(fresh or frozen), peaches(fresh, frozen or canned), cherries are great to use as well.
K.B. says
Awesome! Thank you very much. I am doing a combo of strawberries and Blueberries . We can hardly wait to make it for Xmas. Thank you and happy holidays!
The Bossy Kitchen says
You are very welcome! Happy holidays to you too!
Erica says
Made this last night and it came out great. I tried the custard twice and could not get it to thicken. I mixed it into the cream anyway - not ideal but it worked. Some of the questions on here....are they for real? I apologize for those people if they are.
The Bossy Kitchen says
Hi Erica, Yes, all the questions are 100% real. 🙂
I wonder why the custard did not thicken. It shouldn't be like a thick paste, but it should be thick enough to coat the back of the spoon. After you put the cake together and let it cool in the fridge for few hours, that combination of whipped cream and custard should set nicely. Did it set? The gelatin does the magic. Thank you for visiting and also taking the time to review the recipe.
T says
Can this cake be made without gelatin (animal source) or agar (i hate the taste)?
The Bossy Kitchen says
Hi, You need some form of gelatin. I never worked with agar-agar, so you will have to research a little how much agar you need instead of gelatin. I know that the amounts are not the same, but I do not know anything about the product and I cannot advise you.
Ashley says
I used 4 packets of gelatin and it was way too much and negatively impacted the texture of the custard. Should it be 4 gelatin sheets? Maybe I’m misunderstanding the directions. Otherwise it turned out great.
The Bossy Kitchen says
Hi Ashley, I think you need to reduce the amount to 2 packets, and I will put a note on the recipe. It sounds to me that the strength of the American gelatin is different than the European one. I usually use 28 g of European gelatin, but I think this would be too much if people use an American brand. I am glad that you liked the rest of it. The cake should not be stiff inside, but it should stay together. Thank you for writing back with the comment, I really appreciate it.
Judy Knop says
Gabriela, I first heard about a Charlotte Ruse on an episode of Downton Abbey and had to research it since it was beautiful and obviously desireable! Thank you for your easy to follow recipe. I'll try it. Your comments on tortes were interesting since I married into a German family where I learned to bake with yeast and make "tortes." I have one that my family has outgrown but one daughter and I have been known to eat the whole thing ourselves! It's a family-size Schaum torte with a marshmallowy base, not the hard crusty one commonly produced. It's pretty, yummy, and unusual. If you are interested, let me know & I'll share it with you off line.
Judy
The Bossy Kitchen says
Hi Judy!
I am definitely interested in the recipe. Would you please write at contact@thebossykitchen.com? I hope you try the Charlotte Ruse. It is a really good dessert we make during the holidays. Thank you for taking the time to write and offering a recipe. I am always interested in new things. Happy holidays to you and your family, and I look forward to hearing from you! Gabriela
Catsy says
@Judy Knop, just had to say I'm here after pausing that episode of Downton Abbey to look it up. I was already craving a custardy dessert and then I saw this delight!
(Also now know the clothing store Charlotte Russe was named after a dessert, not a person :))
Can't wait to try this recipe!
Marion Chellew says
I am wondering (and this may be a silly question) when you remove the springform pan, you place the bottom with the plastic wrap on serving plate? How do you avoid serving a bit of wrap with the slice of dessert?
The Bossy Kitchen says
🙂 Marion, there is no silly question. I actually have a big spatula I place underneath the cake to lift and move it on the serving plate. If interested, there is a link for it on the recipe card (affiliated link).
Todd says
These recipe sites have gone to garbage. I don't want your life story. Just a recipe.
The Bossy Kitchen says
Well, I appreciate your feedback, but unfortunately, my life story is actually an essential ingredient in this recipe. It's like adding a pinch of salt or a dash of pepper - you just can't skip it. Maybe next time I'll skip the interesting anecdotes and just get straight to the point like a dry, bland cracker.
However, I am not worried, as you seem to be able to figure out the recipe without my witty banter and fascinating life experiences. Also, you can go to All recipes website for just recipes. This is a blog and my personal space. I can't please everyone, as I am not pizza!
Leah B. says
Todd, you must have a miserable life to take the time to write a comment like that. If you don't want to see something, why read it? There is an option that takes you straight to the recipe. I hope you have a better outlook now and aren't insulting people that you are getting help from, like this recipe.
Chris L says
I am going to try this recipe for Mothers Day. I will follow your directions to the “T”. The finished cake photo shows layers: Bavarian cream and whipped cream mixture on the bottom, fruit, cream mixture at the top, so 3 layers. When you mix the fruit with the cream mixture and pour it into the cake pan, does the mixture separate to create the 3 layers? Should I wait to add the fruit as the second layer, then add the other half of the cream mixture to get the results shown in the photo? Thanks for your reply! P.S. if people want the recipe only they can scroll down to the recipe at the bottom of the page. No need to criticize the other information that appears before the recipe. Just my opinion.
The Bossy Kitchen says
Hi Chris, thank you for your comment. You can make this cake in two ways, with dried fruit (candied) or fresh fruit.
Dried fruit: Mix the dried fruits in the cream, which is a combination of custard mixed with whipped cream and gelatin, right? You will have a layer of lady fingers on the bottom, a layer of cream mixed with dried fruit, another layer of lady fingers, another layer of cream. The fruits will not separate from the cream, but when you cut the cake you will have layers of cream and cookies.
Fresh fruit: You have two options here.
1. Mix the fresh fruit with the cream, then follow the same steps as if you would make the cake with dried fruits.
2. Don't mix the fruit with the cream. Do a layer of cookies on the bottom, a layer of cream, a layer of fresh fruits, cookies, cream etc.
The recipe allows you to play with the ingredients, so go for it. If you want the fruits separately from the cream, don't mix them in. You will have another layer of fruit and the cake will look like my cake.
Whatever you choose to do with the fresh fruit, make sure you squeeze the juice out of them before you add them to the cream or as a layer of the cake, so you don't end up with a wet cake inside.
I hope this helps. Let me know if you have any more questions.
Kathy says
Do you have a conversion for ingredients if using a 9 inch springform pan?
Gabriela says
I don't have a conversion, but generally, the area of a 9-inch pan is about 25% larger than of an 8-inch pan, therefore you'll need to increase the quantities of the ingredients by approximately 25%.
Roxanne says
This instruction is confusing me “ If you use gelatin sheets, squeeze the water after it gets hydrated.”
Gabriela says
I said "If you use gelatin sheets, squeeze the water after it gets hydrated." Gelatin sheets are sold dry, in packages and need to be hydrated in water before you use them in anything. They will absorb some water, but when you are ready to use them, they need to be drained and squeezed from water excess, as you do not need that liquid into your creams or custards. I hope it makes sense.